[Week 1] Notes on Building Wireframes and Low-Fidelity Prototypes
Course 3 of 7 Google's UX Design Professional Certificate by Coursera
Course 3 Week 1 is where we get our hands dirty by diving into storyboarding and wireframing. Course 3 is a smaller one, divided into 3 weeks, each focusing on storyboarding, wireframing, and prototyping respectively.
Up until now we have gone through a lot of concepts related to UX design and dealt with the theoretical part of the design process. This week we put our knowledge to the test by applying it practically before we jump into the prototype phase.
Week 1: Storyboarding and Wireframing
Journey So Far
As UX designers, we want to understand user pain points and develop ideas to solve them. Tools used for this task include Empathy maps, personas, user stories, and user journey maps.
Empathy map: Focuses on what the user says, thinks, does, and feels.
Persona: Personas help you remember who you're designing for and not lose track of the user-centric approach during the complex design process.
User Story: Builds off persona. It introduces the user, identifies an obstacle, and states our ultimate goal. If you have many user needs to consider, user stories determine which ones are the most critical to resolve.
User Journey: Builds off the persona and user story. Helps identify true pain points.
After using the above tools and finding out the pain points, we want to create a problem statement that our design is going to solve.
- Problem statement: A clear description of the user’s need that should be addressed.
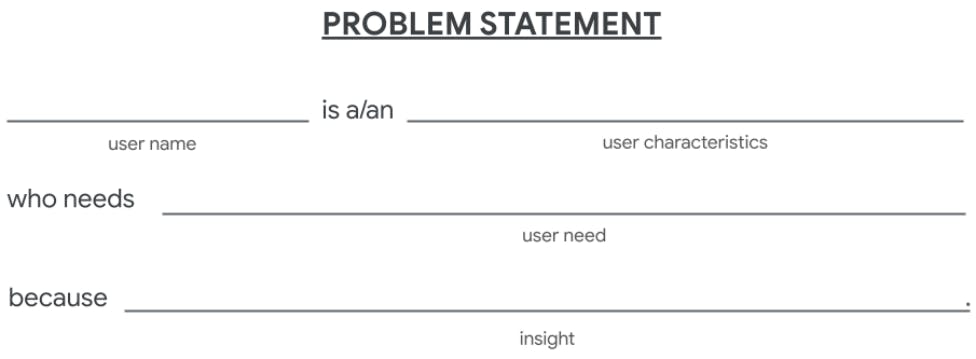
3. Now we want to transition from the problem the user is facing to the solution we can create as UX designers. We will use the problem statement to create a goal statement.
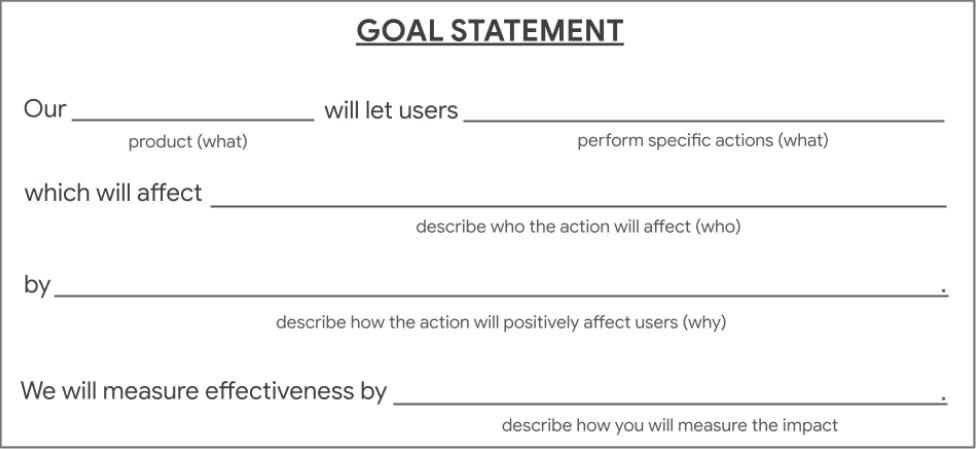
Goal Statement
A goal statement is one or two sentences that describe a product and its benefits for the user.
Unlike a problem statement, a goal statement covers:
What the product lets users do
Who the action affects
Why the action positively affects the user
How the effectiveness of the product is measured
Answers to the goal statement can be pulled from other parts of the UX cycle
What: User Story
Who: Persona
Why: Empathy map and user journey maps
How: Brainstorming
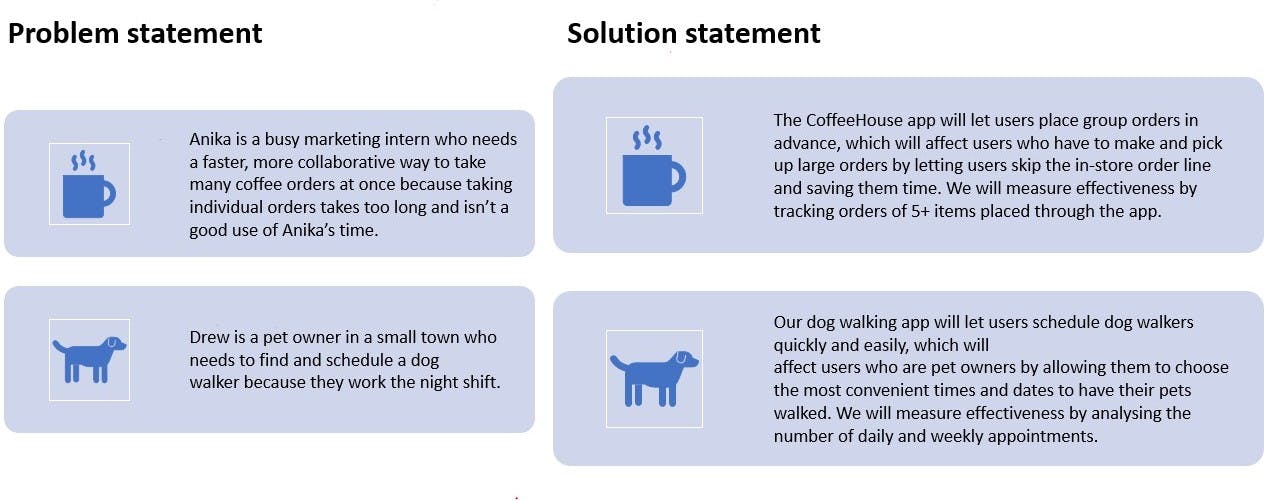
- Or the problem statement can be directly converted into a goal statement:
Problem statement: Sawyer is a construction business owner who needs to attend local trade conferences because they need to network to find more clients.
Goal statement: Our TradeConference app will let users expand their business which will affect how business owners connect with new clients by giving them the ability to connect with clients at local trade shows. We will measure effectiveness by analyzing show attendance.
- More examples of goal statements:
User Flow
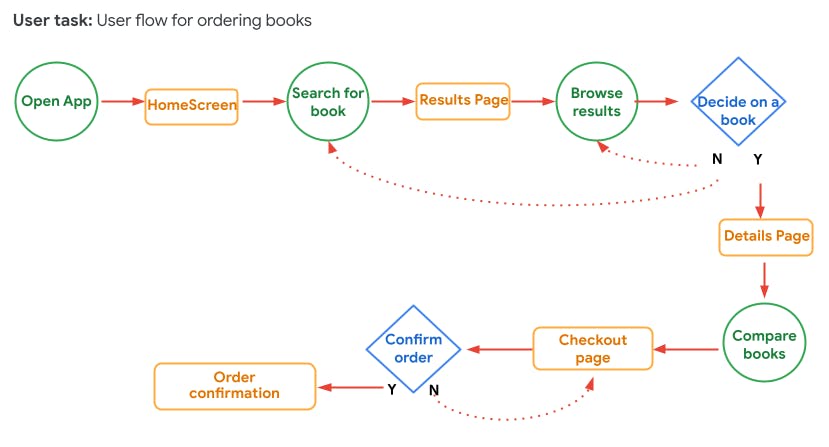
A user flow is a path taken by a typical user on an app or a website, so they can complete a task from start to finish.
User flow can help us picture and answer the following questions:
What actions will users take in the app?
What decisions will users make?
What screens will users experience after taking action or making a decision?
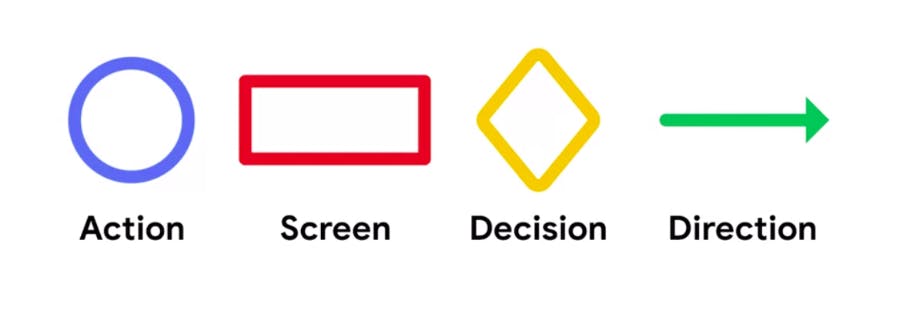
A user flow will commonly use the following shapes
Circle: Represents an action the users take when moving through a product design.
Rectangle: Represents the screens of a digital product that users will experience.
Diamonds: Represents the points in the user flow where users must ask a question and make a decision.
Arrow: Solid lines indicate forward direction through the user flow, and the dotted lines indicate backward direction or return to a previous page.
Storyboards
In UX, a storyboard is a series of panels or frames that visually describe and explore a user's experience with a product. Storyboarding is a tool for making a strong visual connection between the insights you uncovered during research and the flow of experience.
The four key elements of a storyboard are
Character: The user in your story.
Scene: Gives designers a way to imagine the user’s environment.
Plot: Describes the benefit or solution of the design.
Narrative: Describes the user's need or problem and how the design will solve the problem.
A storyboard template can typically consist of:
Scenario: Short sentence that helps us understand the user and the problem we're solving.
Visuals: Sketching area
Captions: Useful for interactions that may be difficult to sketch out.
There are two types of storyboards
Big picture:
Each panel of the big-picture storyboard captures a part of the character's actions that push the plot forward.
Focuses on the hows and whys of the narrative. (How will the user use our app? Why will the app be useful? And why will the user be delighted by the app?)
Shows the emotional engagement that a user will have with our app or with any product.
Useful during the early stage of the design process to present your high-level ideas to stakeholders.
Closeup:
In a close-up storyboard, the sketches in each panel focus on the product instead of on the user experiencing that product.
Focuses on the whats. (What happens on each screen of the product? What does the user do to transition from one screen to another? What are potential problems with the flow?)
Shows the design practicalities instead of the user and emotions.
Useful after your initial design directions have been explored.
Only draw one idea per panel in either case.
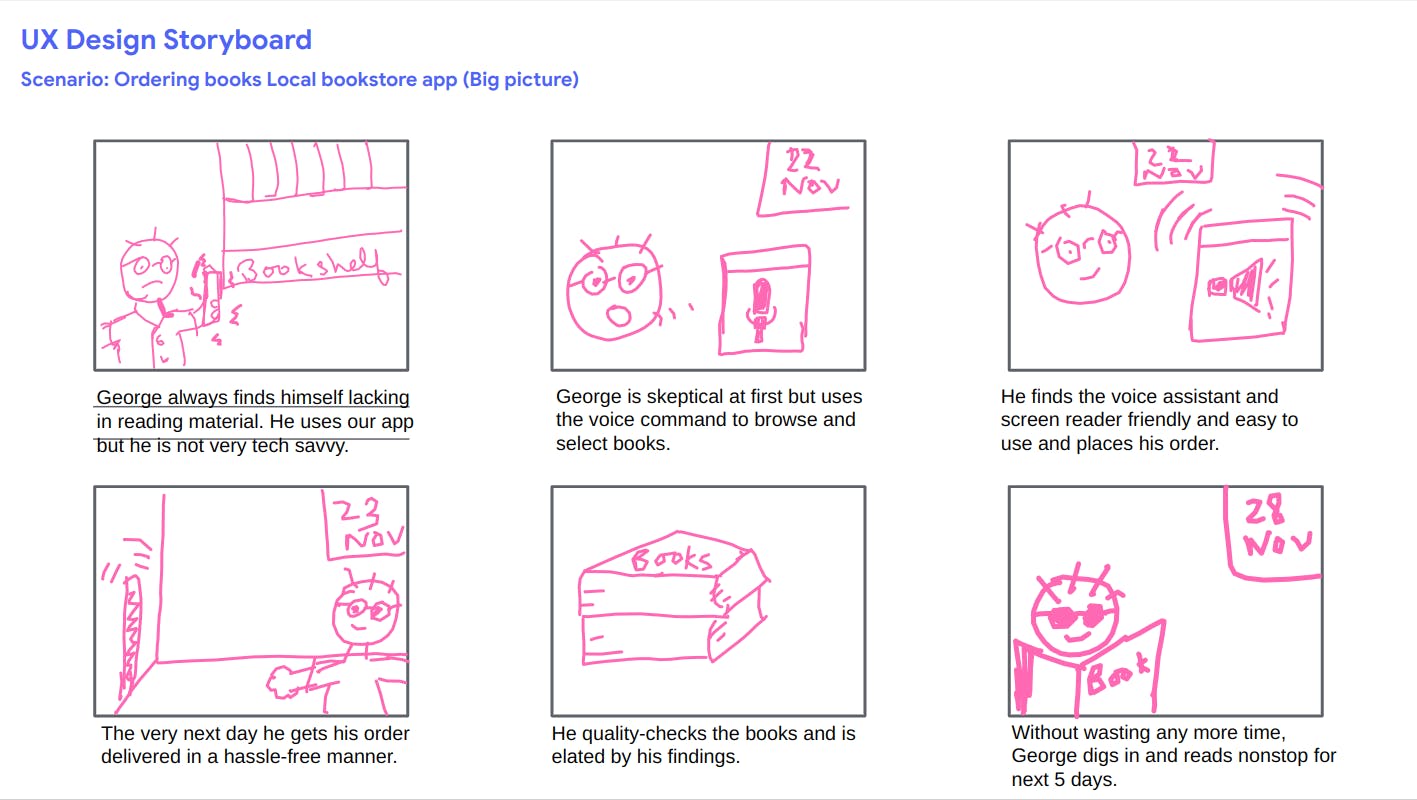
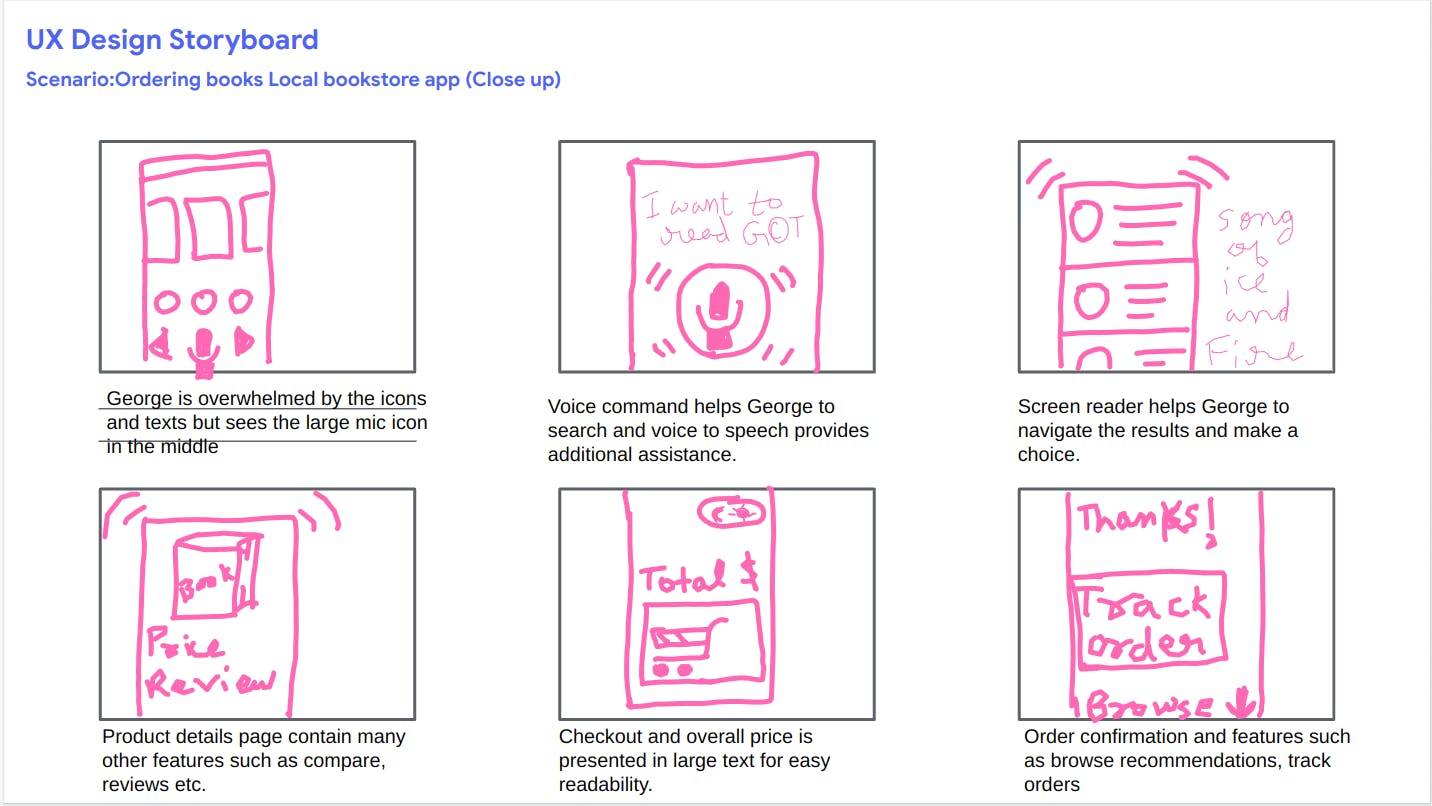
My submissions for the storyboards😅
Lo-Fi vs Hi-Fi

Wireframes
A wireframe is a basic outline of a digital experience, like an app or a website.
A good wireframe is all about organizing and communicating information clearly to your colleagues who will implement your design.
Wireframes constitute basic elements such as lines, shapes like squares and circles, and text.
Few industry standards to keep in mind while wireframing:
Text is represented by horizontal lines.
Images, photos, illustrations, and icons, are represented by a circle and an X overlapping each circle.
Call to action (buttons or other areas of importance) are often represented by rectangles or circles.
This week was a lot of fun as it breaks the monotony of documents and reading we have been doing till now. We will continue on the wireframing part in the next week and will be introduced to Figma as well.
![[Week 1] Notes on Building Wireframes and Low-Fidelity Prototypes](https://cdn.hashnode.com/res/hashnode/image/upload/v1672647005693/7a2a599c-ce15-4ab6-b767-f59c7bb286ba.png?w=1600&h=840&fit=crop&crop=entropy&auto=compress,format&format=webp)